Saturday, June 25, 2016

How to make a Barbie Couch!

 A fruit flat box works the best. You can set it upside down and sit your Barbie on it to measure it's size.
 Cut slits down the middle of both short sides.
 Make an imprint line down the center from one of the slits you made to the other.
 Make the imprint on both sides. Your not cutting into, but making a fold line.
 Fold the box

 This makes the perfect couch structure.
 Tape the box to hold the two sides of bottoms together.


 Tape on both sides.

 Now time to cover the Barbie couch. I usually just drape my material over pressing in around to get a size for lengths as to where my cuts should be in my material.
 I'll make a piece for right down the middle and over the back first, then I'll cut out separate pieces for the arms.
 Hot glue is the easiest to work with. I hot glue my strip down the middle of the couch first to see how it fits, before I cut my sides out.


 I glue it on the outside first and then work my way back.


 On the fruit box it has a dip in the back, but when I'm gluing I just pretend it's not there and let it have a fake back.
 Put glue on the back and then flip it over to cover the back.


 Now it's time to make the sides.
 Easy strip to cover the front and back of the arm of the couch.
 Glue it on.


 I'm gonna put some glue in between the fabric on the top of the arm and then fold it shut like you'd wrap a present.

 Covering the second arm.


 Then I will cover the bottom to give it a finished look. It's unnecessary, but it gives it a more finished look.

 A little more glue and then it will be done.
 front
 back
 All finished!

Thursday, June 23, 2016

How to make a Barbie bed out of a cardboard box!

 I chose this boot box. Shoe boxes and school boxes work great. The box needs to be big enough the Barbie can lay on it, but the sizing is up to your creative mind!


 I like to pick a box that can open, so Barbie clothes and accessories can be stored in it.
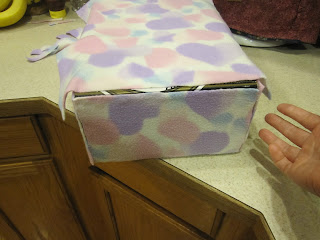
 I first cut some fleece to cover each of the sides of the box to make it have a good finish.

 I then cut some fleece to glue on top with a bit over overhang on each side and enough over hang at the bottom for it to fold back up over to make a blanket.


 Now that all of my pieces are cut out I begin to glue the fleece on each side!


 Now that it is nicely glued on each side I decided to make a pull piece, that will allow my child to more easily open up the box for storage. Just a small rectangular flap.
 I'm giving you enough pictures of this to make up for a lack of video to see what it is to be used for. This is an optional item and depends on your box whether you will need it or not.


 Now I will glue on the top bed pieces beginning with the top and working down to the bottom.

 I like the over hang on each side. I think it looks nicer to fill the gaps the fabric might not cover. It also makes the over lap blanket a bit wider and easier to cover the Barbie's.


 After you reach the bottom you can fold your blanket up and there you have your Barbie bed.
 You can also make up this doll bed with different sizes for different types of dolls. The trick is to use boxes that are sturdy and more durable. Now I'll break out the sewing machine and make some matching pillows.